main
[Connect/Node.js] Atlassian Connect 사용하여 Confluence Cloud 용 테스트앱 추가하기 본문
아래 가이드를 따라서, Confluence 에 macro를 추가하는 테스트용 앱을 추가해 보았다.
Getting started with Connect
Getting started with Connect This tutorial will teach you the basics of developing apps for Confluence Cloud using Connect. The Connect framework handles discovery, installation, authentication, and seamless integration into the Confluence user interface.
developer.atlassian.com
1. Node.js 를 설치한다.
https://nodejs.org/en/download
Download | Node.js
Node.js® is a JavaScript runtime built on Chrome's V8 JavaScript engine.
nodejs.org
2. go.atlassian.com/cloud-dev 에서 테스트용 cloud 환경을 생성한다.
3. 앱 > 앱 관리 > 애드온 관리에서 Enable development mode 체크

4. Atlassian connect 앱을 개발하기 위한 Atlassian Connect Express (ACE) 설치
npm install -g atlas-connect
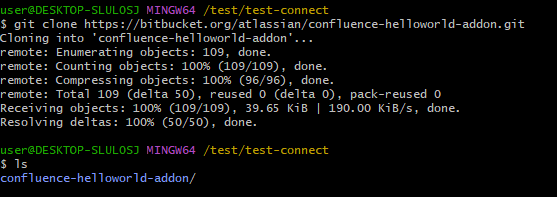
5. Atlassian에서 제공하는 테스트용 앱 다운
git clone https://bitbucket.org/atlassian/confluence-helloworld-addon.git
6. 패키지 디렉토리로 이동하고, 아래 명령어로 필요한 package install 한다
cd confluence-helloworld-addon/

//  "package.json" 파일을 읽어 필요한 모듈들을 자동으로 설치
npm install
7. 디렉토리 내부에 credentials.json 파일을 생성하고, 아래와 같이 작성한다.
domain : https://XXXXXXX.atlassian.net 형식
API 토큰 발행 링크 https://confluence.atlassian.com/x/Vo71Nw
{
   "hosts" : {
      "<your-confluence-domain>": {
         "product" : "confluence",
         "username" : "<user@example.com>",
         "password" : "<api_token>"
      }
   }
}
8. 서버 실행
npm start8-1.
에러)
Failed to establish local tunnel
Make sure that ngrok is installed: npm install --save-dev ngrok
해결) ngrok 모듈 설치한다.
npm install --save-dev ngrok
9. 앱 > 애드온 관리에서 설치된 앱을 확인 할 수 있다.

10. Confluence 에 새로운 문서를 만들고, /hello 라고 치면 추가한 macro를 확인할 수 있다.

끝.
728x90
'ETC' 카테고리의 다른 글
| [Ubuntu 22.04] code-server 설치하기 (0) | 2023.05.12 |
|---|---|
| [Ubuntu] 기본 텍스트 에디터 변경하기 (0) | 2023.05.12 |
| [C#/Winform] 마이크 온/오프 기능 윈폼앱 (0) | 2023.04.26 |
| [Batch] 배치 파일 생성하고 단축키 지정 (Windows 10) (0) | 2023.04.26 |
| [Git] 프로젝트 git 생성 및 원격 저장소 push (.gitignore 파일 추가) (0) | 2023.04.25 |
Comments


